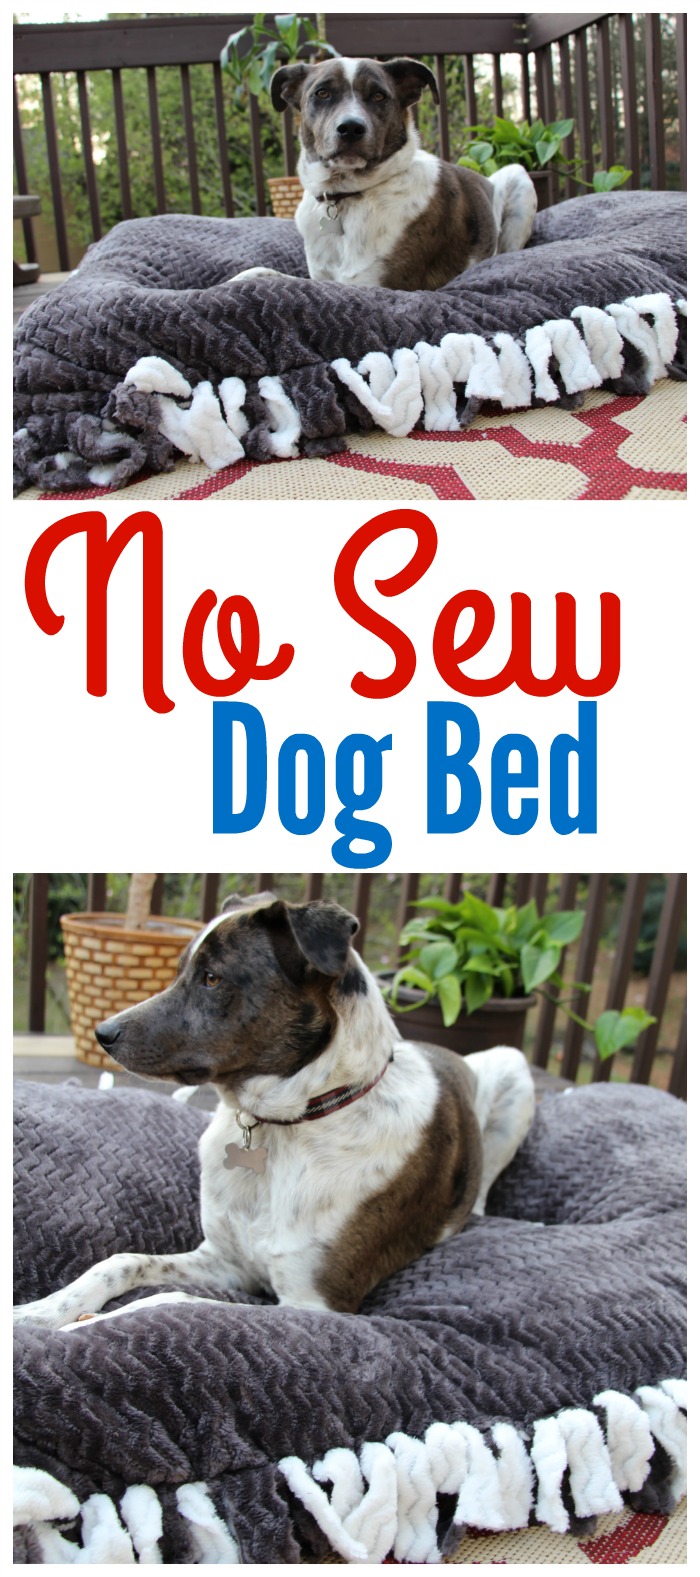
No Sew Dog Bed
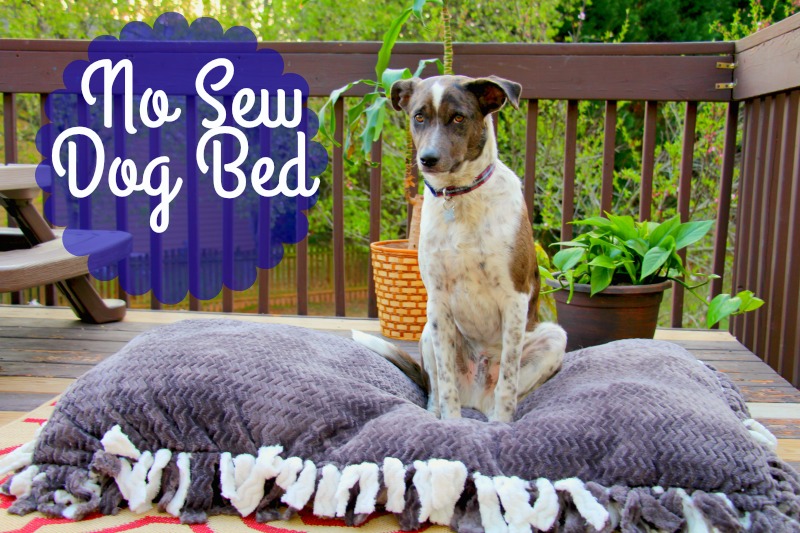
I spent an arm and a leg on this giant orthopedic dog bed that my puppy Duke absolutely loves to sleep on every night. We keep it in our bedroom (next to our nightstand safe) where he sleeps because it takes up way too much room in the living room. I decided he needed something a bit smaller for the living area, something that wasn’t too expensive was easy to relocated. My sister had mentioned to me that she made her dog a bed and that it was super simple and very inexpensive. So this not so crafty lady decided to attempt this whole “make your own dog bed” idea and was shocked at not only how simple it was… but how amazing the dog bed turned out!
Let me mention this again… I am not crafty at all, far too impatient and just don’t have the knack for it. But no sew blankets have always been something I don’t mind doing because they are super easy and require very little talent in the craft area. When I discovered that you could take a no sew blanket, stuff it with polyfil, and have your very own dog bed… I was completely on board! So let me show you just how simple it is to create this gorgeous dog bed!
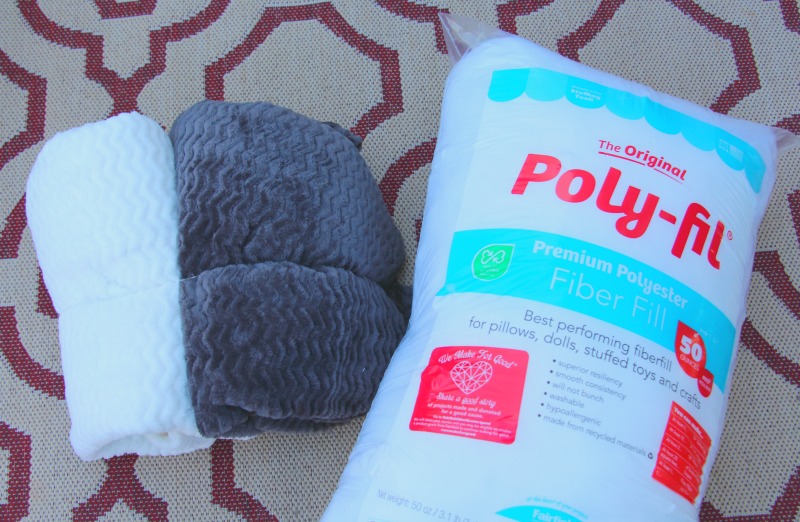
Materials Needed:
- two fleece choices cut to 1 1/2 yards each
- 30-50oz polyfil
- fabric scissors
- measuring tape
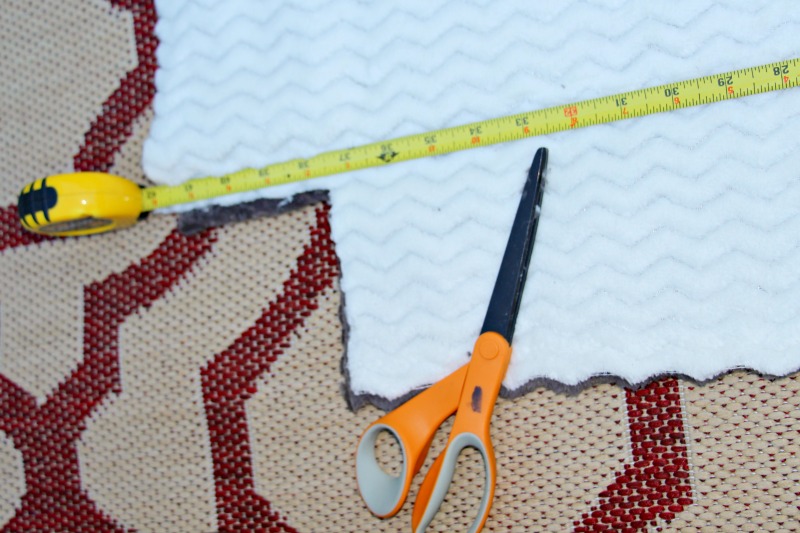
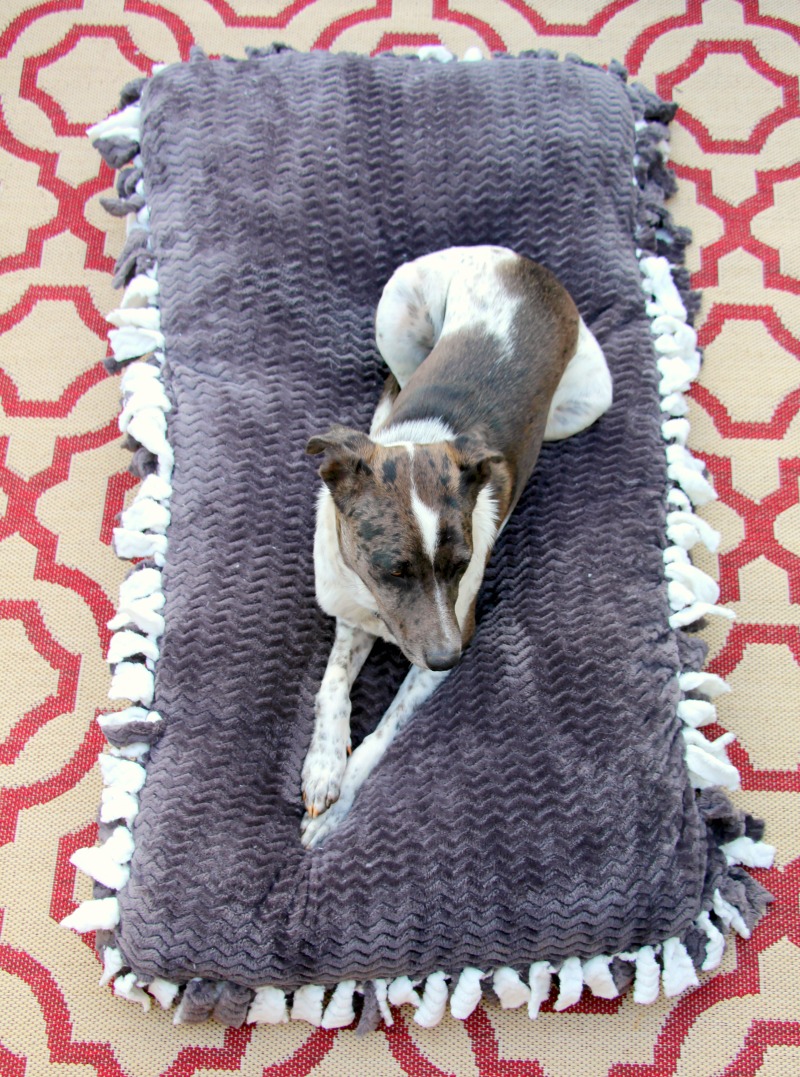
Your first step is to lay the two pieces of fabric on top of each other, making sure the correct sides are facing outwards. Now you are going to cut your material to the length/shape you desire and this really depends on the size of your dog. I actually had my dog lay down on the fabric so I could view how much space he would need. Before you cut, keep in mind that you are going to lose 5 inches around the entire bed when you cut the strips around the outside. I ended up cutting my fleece 62”X41” to give it a rectangular shape and plenty of room for my dog to grow.
Next you are going to cut a 5″x5″ square away from each corner, toss the scraps.
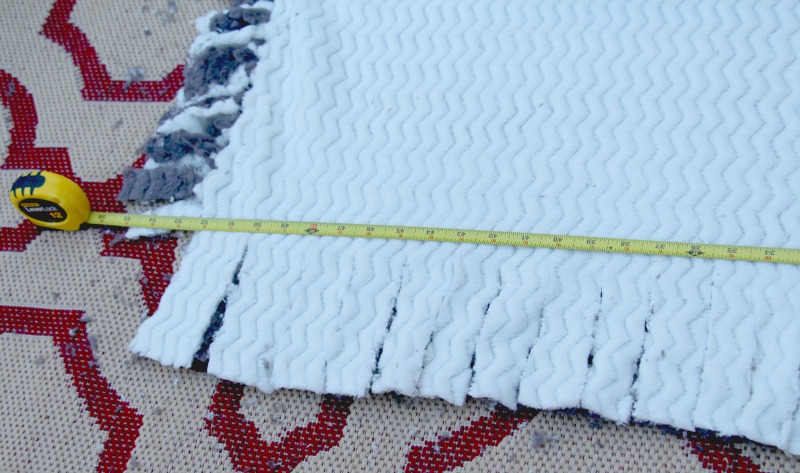
Next you are going to start cutting fringe pieces across the first edge of your dog bed (any side, doesn’t matter). Cut the strips roughly 1 1/2″-2/12″ thick each, i find the thinner the better to work with

Now you are going to use your measuring tape to ensure that you do not cut the strips more than 5″ in length, just lay it across the side you are cutting.
Once all four sides are cut, you are going to tie the fringe pieces into knots. Make sure not too tie the knots too tightly. Also keep an eye on the knots to ensure that they align. Something else you will want to do is occasionally pull the blanket and straighten. If you are tying to knots too tight the blanket will begin to bunch and become uneven. So make sure to make adjustments as you go in order to avoid this.
Before completing your fourth side, start stuffing your bed with the polyfil. I used an entire 50oz bag of polyfil for this, this stuff is pretty cheap so I would definitely recommend going with too much than not enough!
Once you have filled your bed, make sure it is stuffed evenly and continue to tie the final edge of your dog bed. Then you are done, yes that was it!
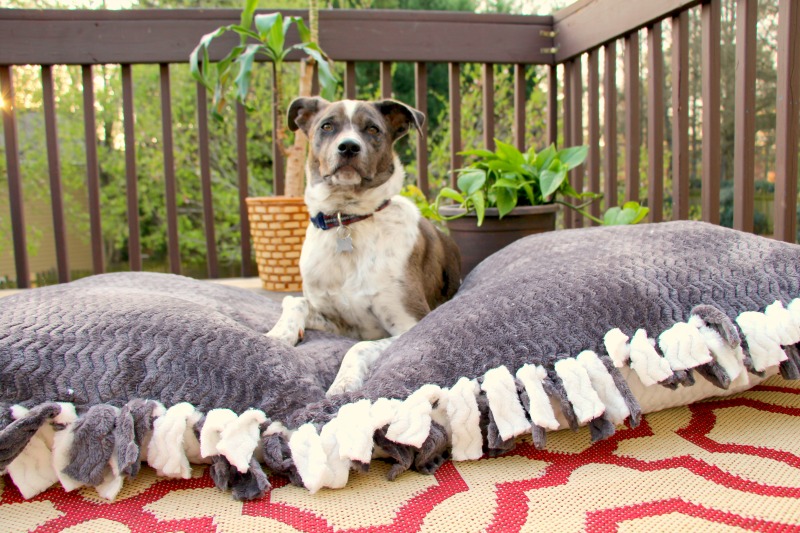
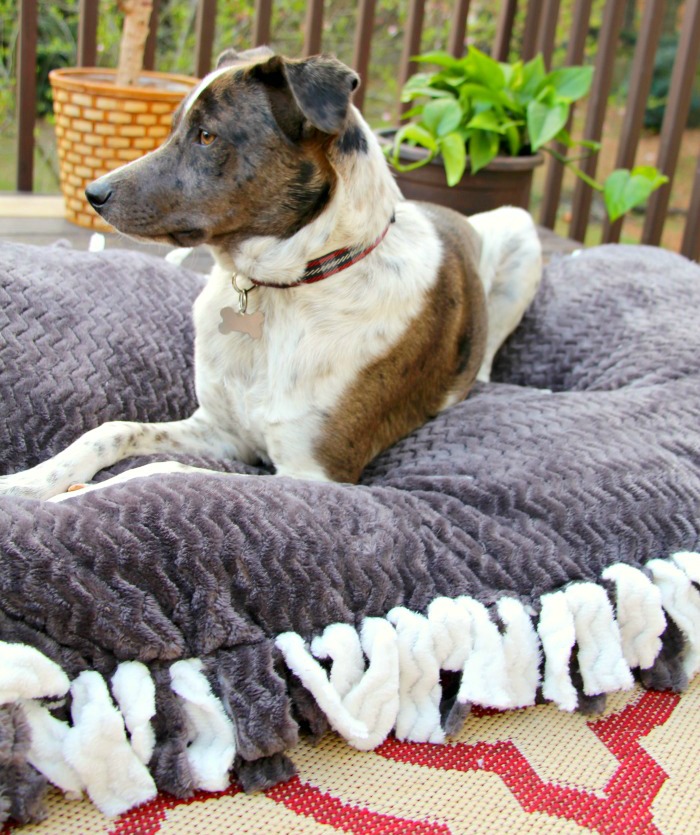
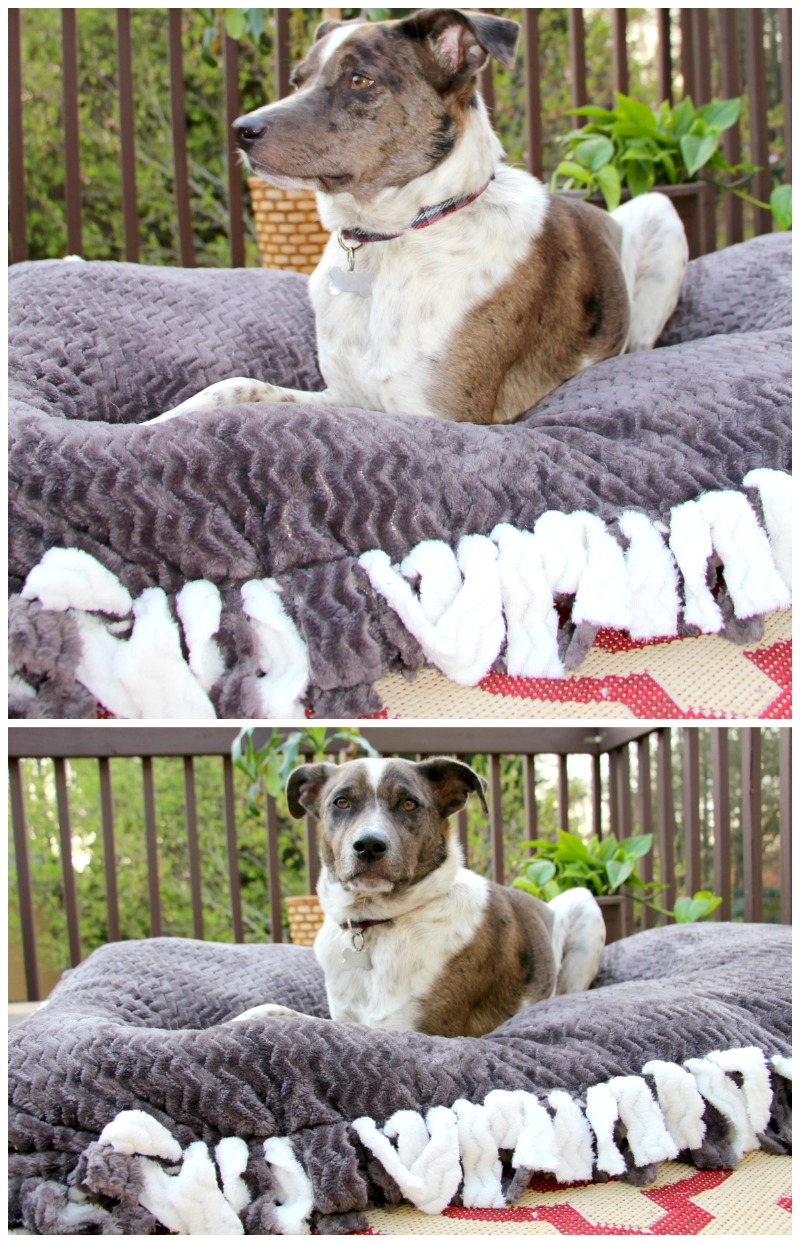
Your adorable pup can now enjoy a luxury dog bed that your made all on your own and didn’t spend a fortune on!

How amazing did this dog bed turn out? This literally cost me about $25 in materials, a little over an hour to make and my dog is in love with it!
I think this was the perfect size for him too, as he is only 10 months old and will grow a bit more and there is plenty of room on the bed for him to grow!
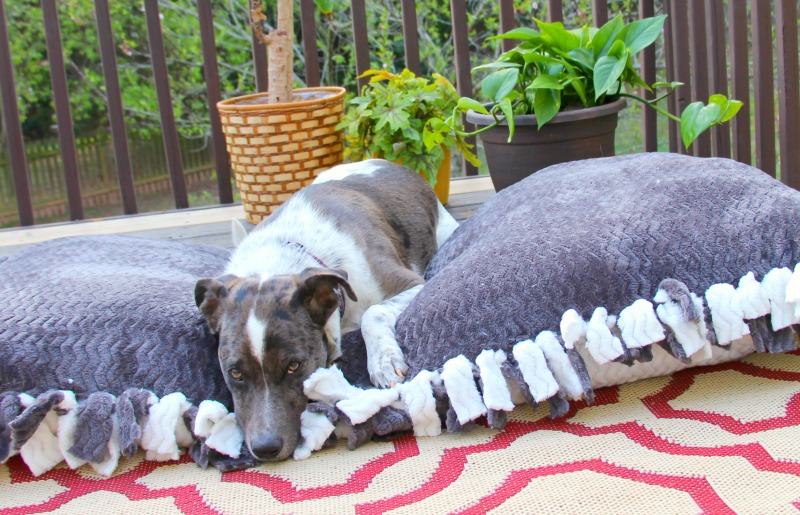
This is one very happy puppy!!!
Let me know in the comment section down below if you spoiled your dog with a no sew dog bed and how it turned out!
How do you keep the polyfill from clumping when you wash the bed?
How do you not the polyfill from clumping when you wash the bed? Help???
You could always put the the polyfill into another casing inside the dog bed. You’ll likely have to use more fill but at least it wouldn’t clump as much since it’s already packed tight
I would assume that the best way to keep it from clumping would be to remove it, wash the fabric and then restuff it but of course by doing that the polyfil is not being cleaned…
This just looks amazing, I was looking for some instructions or a template for a dog bed that I was planning to send to the RSPCA, and since I have no tools such as a sewing machine, this was just perfect. Thank You.
I love this idea & can’t wait to make Jo-jo his own bed. The idea of this project is right on time, I have noticed he’ s reluctantancy to jump up on my bed as he has done in the past. So to provide him with his own super comfy space on the floor is just what is needed to ensure his comfort. Thank you for this very well written project. Can’t wait to get started and pick out fabric and stuffing! Lindsey
I was wondering if I could use foam egg crate material instead of poly fill? I could still wash it, just have to take out & wash separate. Think it would work?
Fantastic tip. I always hated sewing. I should try this out soon. Thanks!
Hi Heather, this no sew dog bed looks so adorable, and easy to make. Yap! I’m definitely doing this for my puppy.. Thanks for the guide.
Hello,
this is a very informative article and I have read it you are a great blogger and I started a blog hope it will succeed as you keep it up such a nice posting like this.
Thank You.
Heather, have you answered these questions ? I was particularly interested in how to keep the polyfil from bunching up during the wash. Thank you.
The best way to wash the bed is to untie a few strips and take it out. Then after washing fill it up again.
Put the stuffing in a pillow protector, then stuff it in the blanket. That way, it can be thrown in the washer too (or removed) and the filling doesn’t get dirty or wet 🙂
Thank you so much for such a great idea. I will endeavour to make a round one following your instructions. I can imagine that if polyfil being so affordable can be replaced when it gets smelly and then just wash the cover.
Hello. I’m thinking of making this awesome looking dog bed. Thank you for the advice. I’m planning to use an old pillowcase, ( we all have at least one in our closet), Stuff that, and fabric glue it, then the cute cover can be easily removed and laundered. I do have a small yorkie, so it will be the perfect size for him. Maybe for a larger dog, make the cover big enough to hold two?
Really very nice and informative article. Keep sharing these helpful articles. Thank You.
Nice article. Your dog seems comfortable on this new bed. Lovely idea.
Dog beds need a good cloth that they can’t easily chew through or destroy. It needs good quality material.
So easy and looks amazing. Turned out better than I could have hoped for. Will fit both of my dogs on it easily. Stuffed with old pillows so will be easy to remove to wash.