How To Craft A Farmhouse Table
Going to the store and picking out a brand-new farmhouse table is a great way to update your home, but it might break the bank in the process. What if you could build your very own farmhouse table and keep the amount you spend to a minimum? If you are intrigued by that question, then this article is for you.
Many people are looking to add a touch of the HGTV show, Fixer Upper, into their homes and adding farmhouse tables is a great starting place! Crafting farmhouse table is a long process, but it’s worth the effort. For specific tutorials about how to craft your own farmhouse table, be sure to check DIYFormula.
Here is a description on how to craft farmhouse tables, without breaking the bank.
Supplies
- 2 1/2 inch Kreg Screws – You will need one box.
- 6 inch Torq Screws – You will need about 40.
- 4.5 inch Torq Screws – You will need about 20.
- 2.5 inch Torq Screws – You will need about 20.
- Sandpaper
- Stain – Whatever color you desire.
- Wood – You will need 4×4, 2×10, and 2×4s.
Tools
- Pencil
- Hearing Protection
- Safety Goggles
- Drill
- Kreg Jig
- Clamps
- 12″ Miter Saw
- Tape Measure
- Orbital Sander
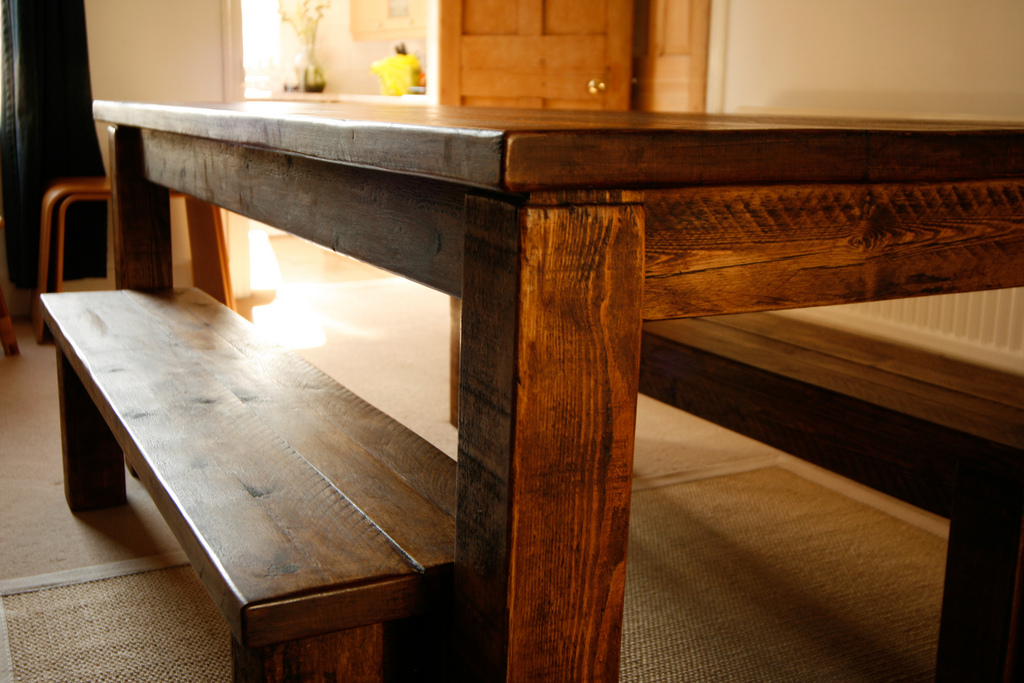
The first step is to build the table top using 2×10 boards (about 5-6 depending on how wide you want the table) and a 2×10 for each end. You will lay your 5-6 boards out with the long sides touching one another and then place the end boards perpendicular to it and cut it the width of the boards together (this board at the opposite angle is referred to as the breadboard). If you are doing 5 boards, it will be 46 1/4 x 87 1/2.
Using your pencil, make marks on your boards on the edges about 8-10 inches apart for your pocket screws. With your Kreg jig set at 2 1/2″, you will attach each board using 2 1/2″ screws. When doing this step, try clamping your boards to each other and use body weight to make it easier to attach each board. On the end of each board, you need to also add two pocket screws for attaching to the breadboards.
For each end to the base of the table, you need to cut your 4x4s to the following lengths – 43″, 25 3/8″ (x2), and 36 1/4″. You will take the 25 3/8″ boards and cut them to a 10-degree angle for the vertical boards. Between these two boards will go the 36 1/4″ board cut to a 10-degree angle on both sides. You will connect the two ends with the vertical piece using 6″ torq screws and the horizontal pieces will be connected using clamps to help hold everything into place.
You will add two 2x4s the length of 69″ to the two end pieces you just made to hold up the table top. Cut an additional piece of 4×4 wood to 69″ and place it across the center of the base. Set your base up and attach it to the tabletop using 4.5″ torq screws through the 4x4s. You will connect the braces at an angle of 45 degrees. You will attach the tabletop to the base using 6″ screws and drilled in at an angle.
Once you have completed your table, you can make benches to go on either side to add seating to your new farmhouse table.
To make your table feel more rustic, take a hammer, and ding it up all over to add texture and more of a worn look. Using a screwdriver, you can scrape areas of the tabletop to add character as well. The more time you spend on this step, the more rustic and worn your table will appear upon staining and sealing.
Sand down the edges of your table so there is not any rough spots that might cause splinters or look incomplete.
When your table and benches are completed, it is time to make it personal and add your favorite stain color. When staining furniture, remember that a little bit goes a long way and it will stain anything it touches – this is by design, so make sure you are wearing old clothes and have gloves to protect your hands. When you stain you will add a small amount of wood color and rub it in until it is all the desired color. To make it a little bit darker, add a separate layer once the initial layer has completely dried.
After you have let your stain color dry overnight, the last step is to seal your new creation using polyurethane fast drying sealant. You will use a paintbrush and add a thin coat to the entire table and let it completely dry. When you add this layer, the table will look shiny and ready for a party. Have a friend or two help you carry this table inside and enjoy your new farmhouse table.
One thought on “How To Craft A Farmhouse Table”